Montée par Leo Cat
Voir les matériaux au fur et à mesure des étapes de montage.
Un montage classique d'après Aimé Devaux.


Crédit photo peches-sportives.com/
Montée par Leo Cat
Voir les matériaux au fur et à mesure des étapes de montage.
Un montage classique d'après Aimé Devaux.


Crédit photo peches-sportives.com/
Montée par Barry Ord Clarke de The feather bender
Voir les matériaux au fur et à mesure des étapes de montage.
Montage parachute complexe. Corps en quill noir et blanc et thorax en herl de paon. Ajouté des pattes en élastique pour donner de la mobilité et de l’attractivité à la mouche.
Voir le retournement de l'attache de l'hameçon sur l'étau pour faciliter l'enroulement du hackle parachute et la difficulté pour faire le noeud final.

Montée par Philippe Giraud plus connu sous le surnom de Transistor pour (sponsorisé par?) Mouches Devaux
Matériaux:
Hameçon : DXD 120 BL N° 16 - https://bit.ly/2Isyx83
Fil de montage : 8/0 DVX noir - https://bit.ly/2VSPso8
Corps : Pro-Quills naturel - https://bit.ly/2OGqe9Q
Thorax : Dubbing Ultralight DVX noir - https://bit.ly/30nrkwr
Collerette : Hackles Genetic DVX Grizzly : https://bit.ly/2Hsqtlr
Toupet : Z'air DVX rose fluo : https://bit.ly/2JIpPTJ
Noter le corps en quill, le montage du hackle avec des enroulements en huit, le toupet, le thorax en dubbing noir.
Voir le positionnement de l’hameçon dans l’étau pour faciliter le montage parachute du hackle.
Le toupet pourrait être de n'importe couleur pourvu qu'elle soit visible, le blanc par exemple.

Montée par Frédéric Othon
Voir les matériaux au fur et à mesure des étapes de montage.
L'ORC ou l'oreille de chevreuil remplace la plume traditionnelle dans ce montage parachute.
Noter que ce montage commence par la confection de la tête avec la formation d'une petite boule consolidée à la résine, prolongé par des cerques, un corps en quill synthétique ou en dubbing, un toupet en fibre de plume de canard positionné verticalement par des enroulements en huit en s'aidant d'une aiguille. Le montage du corps est consolidé par de la colle avant les enroulements du quill. Le thorax est en dubbing de lièvre et enfin la pincée de poils de chevreuil pour le montage parachute.
Voir un autre montage parachute similaire en poils d'écureuil de nico64. ou encore une émergente parachute.

Montée par Skyler Hardman
Matériaux:
Hook: Standard Nymph
Lead: .015 Lead wire
Thread: Danville 70 Denier flymaster plus
Tail: Pheasant Tail
Body: Hare's Ear Dubbing
Ribbing: Small Gold Wire
Wing Case: 1/8" Black Scud back
Ressemble au montage de la PT. Le herl de faisan est ici remplacé par un dubbing de lièvre.
Note de l’auteur: Un modèle classique, la nymphe de l'oreille du lièvre est connue pour tromper les poissons depuis des générations. Habituellement l'une des premières mouches apprises par les nouveaux monteurs, ne pensez pas un seul instant que l'oreille de lièvre ne peut pas fonctionner aussi bien que les mouches plus sophistiquées. Elle peut être montée lestée ou non lestée pour imiter les différentes étapes de la vie, dans ce cas, je vais la monter lestée.

Montée par tightlinevideo
Voir les matériaux au fur et à mesure des étapes de montage.
Montage comparable à une PT traditionnelle mais dont le corps est à base de dubbing d'oreille de lièvre, le thorax en dubbing de lièvre au lieu du traditionnel corps en fibre de plume de faisan.
A l'inverse les cerques et le sac alaire sont en fibres de plume de faisan consolidé par de la résine UV.

Montée par Fly Skinz
Voir les matériaux
Noter l'utilisation du dubbing pour le sous-cops et son brossage vers l'arrière afin de faire ressortir des fibres entre les enroulements du latex.
On pourrait également utiliser de la laine à la place du dubbing pour faire le sous-corps.
Finitions aux marqueurs de couleur.

Voir les matériaux au fur et à mesure des étapes de montage.
Intéressant avec toujours un corps en peau synthétique (skin) ou latex et enroulement de fil de cuivre Les yeux en fil de nylon brûlé et les antennes ne sont sans doute pas indispensables. L’enroulement du fil pour confectionner la forme du corps est particulière et pourrait être modifiée en utilisant par exemple du fil de laine en sous-corps (on gagnerait du temps). Noter le travail au marqueur tout au long du montage comme dans beaucoup de cas. On voit le corps par transparence. Montage un peu trop long, pourrait être simplifié.

L’accès à la traductions Czech Nymphing 101 est protégé par mot de passe.
Les traductions ne sont accessibles qu’aux visiteurs ayant fait un don à la recherche médicale pour la maladie de Charcot.

Steve Parrott nous enseigne comment pêcher à la nymphe au fil.
Une vidéo très intéressante sur les différentes techniques et montages, en particulier sur les méthodes de pêche à plusieurs mouches.
Voir également les couleurs des nymphes et les points principaux de la méthode appelée "Méthode Tchèque."
Note: On s'aperçoit à la lecture des sous-titres anglais de la vidéo qu'il y a des erreurs, à plus forte raison dans les sous-titres traduits. cette remarque est générale et s'applique à toutes les vidéo offrant les sous-titres et traductions automatisés. J'ai donc entrepris les corrections et ajouté les ponctuations dans les textes des sous-titres de la vidéo.
Textes corrigés des sous-titres de la vidéo:
Rigging and selecting flies
Setting up your flies for the Czech method.
You have a couple different options so you can run three flies which is great for big water deep water. It can be a little more problematic when fishing it wants to tangle a little bit more especially when you catch a fish.
Three fly rig
When setting up that three fly method though you'll want to light fly on the very first dropper tag, the middle position second drop or down is going to be your heaviest fly. That way the Flies will actually sink in a V when they come down and you'll have a light slide on top and the heaviest fly your anchor fly is going to be in the middle position
in a three fly rig.
Two fly rig
When you're setting up a two fly rig you always want the heaviest anchor fly on the bottom or point position and then you can run a lighter offering up top, whether it will have a bead, not to be, no weight, a little weigh, it doesn't really matter in that top position.
Shallow water rig
The only time you would switch those flies around on a jack nymph rig, as well as a Polish or a French rig and even the Spanish, is if you want to fish some really shallow water and that bottom fly is going to hang up really bad in that six to 18 inches of water you're going to move your heaviest fly up to the dropper tag and run your lighter fly on the back that way with moving the rod up and down or back and forth downstream you can control the depth of your drift a little bit better because if you're trying to control the depth of the drift with the heaviest fly on the bottom then you're going to be lifting it to wear your top fly is not in the water. So shallow water you move that heavy fly up to the point.
What color flies do you fish
That's really your personal preference. The way I look at it is first I'll choose weight.
I try to color code all my flies with a little head or some kind of classification. I know how much these flies weight then as far as color choices we all know our home waters. Pick the color that you like. The color that you have the most confidence in my favorites are the catus greens, brown and orange woven nymphs, green and orange woven mints. There will be instances where I want to fish shrimp colored patterns and then I'll go with these super flashy flies. Sometimes we call those wilds or clown flies. They look like nothing in the river yet they're just there in a tractor. It's kind of like your flashback myths. But fly selection is completely up to you and then make notes when you fish a river and this fly worked really well on. This date make a note of it.
When you set up your flies you want to have them at least 20 inches apart, when I say 20 inches apart you've got to drop or tag. That dropper tag is going to be 8 to 10 inches. You want to let that dropper tag hang and from the point that it's at the bottom where the fly is attached to the tag from there 20 inches apart. Plus with having these flies 20 inches apart you can really control it back.
Approaching the river
So, when approaching the river, you want to start you want to fish the edges. If you don't fish the edges of the river, you're probably going to walk across five or six fish that you could have called. These fish are tucked in next next to the bank with this higher flow and so you want to start low.
You got your flies in your hand, nice little loop down below your fly line to give you some tension and then very very very little fly line out the end of the rod tip. I've got my indicator and about four inches of fly line out so what we're going to do now I'm going to point my rod downstream and just kind of flip my flies out into the water.
I'm going to come to the one o'clock position and I'm going to pop it right in there drift; drift right at the very end of this drift we're going to give a quick position set it's an up and out to the one o'clock position. That way we can cast again go right back in the river. We're drifting drifting drifting if you haven't felt to take up and out as I'm casting this line into the water you can see that I instantly tighten up on it and start moving the rod tip downstream.
With the Czech Polish French or Spanish method flies hit the water they go to the bottom as you create that 45-degree angle with your line entering the water
You've got one fly that's tumbling across the bottom. Your other flight is kind of rolling up in the water column, so you're allowing the water to just roll that fly around on that dropper tag and it just looks like natural flies.
Drifting although these flies are not that natural looking it's more we're getting back into that. We want the fish to to take it not being selective but being opportunistic. So you're able to cover the water column. However high hold your rod or adjust it to get to these fish. So you can cover a lot more water with a lot less effort. The one thing you never want to do is bat cast these flies they're so heavy.
There's no taper on the leader so the power transfer coming from the rod to the fly line to the leader is pretty much killed what we're relying on is the weight on the end.
The leader from the Flies to propel these forward the Flies are ridiculously heavy and some of these are upwards of four grams apiece so when they hit the water it's like Apollo 11 coming back in for re-entry. So is that a presentation cast no you want to take these flies you want to drive them in the water wha you're relying on is the fast water that your fishing is actually deadening just about any sound that the fish will hear.
They'll pick up the splash sometimes with the lateral line and they'll think it's food. So a lot of times they'll swim right over there and eat it. But are you worried about delicate presentations?
With this method no so you want to bring your rod tip to the one o'clock position.
Lob cast it in tighten up on it the ultimate goal is to keep the line going into the water at a 45 degree angle and you're slightly pulling downstream like so. As you can see I'm crouched down I don't want to spook any of these fish if there any right here in this little side seam complete Czech ninfea.
You're going to get a foot two feet max above that fish or where you think fish might be you're going to lob it in there.
You're going to tighten up on it and start your drip and that first two feet before you where you think the fish are you're going to adjust your drift to make sure it's rolling across the bottom.
It's not uncommon that you're looking at a fish or looking at a run knowing there's fish in there. You love it a foot to two feet above where you actually think the fish are and you hook one above it because as soon as flies hit they are in contact with the bottom and the fish typically just swim over. Pick them right up we're going to break this river down into 12 inch sections we're going to go across the river starting right next to the bank twelve inches across right in there again. We're going to move across the river drift drift drift drift.As we get to the end we're going to give a quick position set which is up a little snap of the wrist in an upward motion.
I see a lot of anglers on the river they'll make three four five cast in a section there's no fish there and they move with this method. I like to break the river down into a foot twelve inch sections, I like to make eight to ten cast in every section that way I know I've gotten at least four good drifts through there my flies are on the bottom and if there was a fish in there then my opportunities to catch it just went up. Then you move over and you cover another section of water. So a run or riffle I'll break it down twelve inch sections and then may be eight ten feet long. So it'll take me a while to fish a little piece of water and you can swatch anglers with standard rigs they just jump in there four or five cast. There's nothing in here which is great news you can move right in there and just catch all the fish that they just left got.
This big Rolly piece of water right here a lot of times away that hydraulic words. The fastest current is going to be in the top six to twelve inches of water and I can fish right underneath that with this rig because the Flies are so heavy they'll get down. So I'll throw it right up at the top of it and drift it down through there quick position. Set a lot of times if you catch a fish orout from underneath this Rolly water like this they had no idea you were there with the Czech polish French or Spanish method you can get up into that riff flea water which is where fish moved to feed and you can really catch a lot of fish out of those waters that you're typically going to miss with your standard indicator rig and the reason that is is just the way it sinks it sinks in an arcing motion where the heavier flies that we use on the to fly rig when they hit the water they're right on the ball instantly and you're covering that water quickly a lot of times you'll cast up into that fast water and say oh there's not a fish in there and by the time you tighten up on the rig after you've made your cast the fish is already eating your fly and jumping out of the water with it. With fishing this heavier fly with level leaders you are in contact with the bottom. If there's a lot of sticks and debris in the bottom of the string you're going to hang up a lot. So I'm hung up on the bottom now a lot of times.
What happens if you'll just slide up a little bit and just move very methodically if you'll get your rod tip over you strip down a little bit a lot of times it'll just pop right out if you don't fish these on droplet tags like we're going to show you in the rigging section. Then the way that you're keeping your 45-degree angle of your leader into the water you're basically letting the hook point rod and that's the first thing that's going to any stick rock Boulder it's going to come in contact with and it will hang up instantly where being on the tag it's allowed to roll like a bowling ball down the river. So most anglers on the stream when you watch them fish whether it be an indicator or a dry fly they get a tape fish indicator goes under they'll lift it straight up and hook with the Czech method. Your rod tips parallel to the water you don't have that you're not high-sticking. So as you're drifting drifting drifting and that indicator jumps you feel the rod bump you know quick vibration or you see the fish. It's an up and away hook set. So you're swinging the fly into the fish's mouth even more if you lift it straight up that fish may have started to realize okay this is not real and I'm spitting it out or so you're pulling it back into the fish at that point in time when you've got them hooked. Then you want to get right above them keep your rod tip high keep the tip over the fish and fight them. The only bad part about setting the hook down in a way with this method is when you if you hit a smaller fish now a lot of times they'll jump out of the water and start cartwheeling end-over-end and with the heavy tungsten being flopping around you'll lose a couple but not a very common thing that happens because the way you're driving that hook you'll usually have them right in in the top of the mouth or in the corner which is you get extra points for putting them there. So you really want to get that fish on the reel you've got a nice reel. You've got a nice drag system with it use it the drag is much more sensitive than your finger your typical reaction when a fish makes a hard run on you is to clamp down on the line well the fish is going south the lines trying to go south and you're stopping it or pulling it back north something's got a break and it's going to be the tip hopefully not the rod but usually the dipping get the fish on the reel let the reel do its work you don't feel like you have enough drag is when you're playing and always reach up and just adjust the knob a little bit give a little more tension to the point where it's not locked down.
Traduction souhaitée?
L’accès à la traductions Cut Loop Nymphs est protégé par mot de passe.
Les traductions ne sont accessibles qu’aux visiteurs ayant fait un don à la recherche médicale pour la maladie de Charcot.

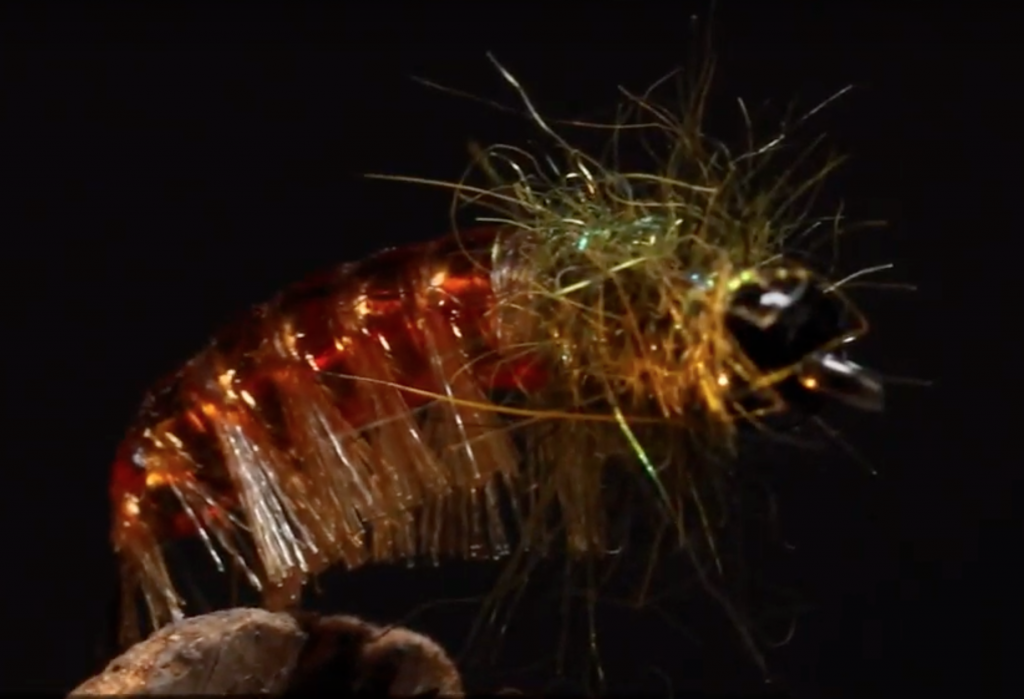
(Les pattes sont ici en organza.)
Par Nick Thomas.
Voir les matériaux.
Montage étape par étape.
Méthode un peu lourde. Astucieux mais peut-être lui préférer d’autres montages de pattes. Ne pas mettre de vernis mais de la colle pour le noeud final.
Je n’ai pas très bien saisi à quoi servait le sous-corps de couleur argent sauf si on admet d'espacer un peu les enroulements du fil élastique pour le laisser apparaitre entre les enroulements et que, suivant la couleur utilisée pour le fil élastique, on peut obtenir un reflet par transparence.
Notes de l'auteur:
A great way to easily add multiple gills and/or legs to nymph or shrimp patterns. A spiral of fibres is wound up the body over a plastic tube held in place under the body with temporary thread wraps. The fibres are then locked in place along the back with UV-resin, the tube removed and the resulting loops cut to form the gills or legs. I've used organza fibres in the video, but the same method could be used with any long synthetic fibre. Thanks for watching. Traduction souhaitée?
Nick Thomas est le spécialiste de montages d'artificielles en organza. Un article lui sera spécialement consacré. Il est très présent sur les réseaux et on peut le suivre sur Global FlyFisher, sur Youtube ou sur la revue E(eat)S(leep)F(ish).
L’accès à la traduction de Egan’s Red Dart est protégé par mot de passe.
Les traductions ne sont accessibles qu’aux visiteurs ayant fait un don à la recherche médicale pour la maladie de Charcot.